
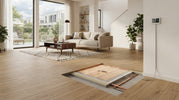
Infrared underfloor heating set: costs and choices for the home
, by Warmteshop, 17 min read
, by Warmteshop, 17 min read
The consumption per hour depends mainly on the power of the foil and how long the thermostat keeps it switched on. An infrared underfloor heating set with 10 m² of foil at 80 watts per m² uses 0.8 kWh in one hour at full power…
The hourly consumption depends mainly on the power of the foil and how long the thermostat keeps it switched on. An infrared underfloor heating set with 10 m² of foil at 80 watts per m² uses 0.8 kWh in one hour at full power. How much that costs also depends on your electricity tariff.
It makes sense to look at hourly consumption first: this gives you a concrete picture of what heating requires. However, power output alone does not tell the whole story. The heated surface area, your home's insulation, and thermostat settings also play a role.
In this article, you will read how to choose a set and which factors determine consumption. You will also discover where the heating foil and floor sensor fit, which floor coverings are suitable, and which installation choices require attention. This allows you to tailor the technology to your space and determine exactly which solution suits your living comfort.
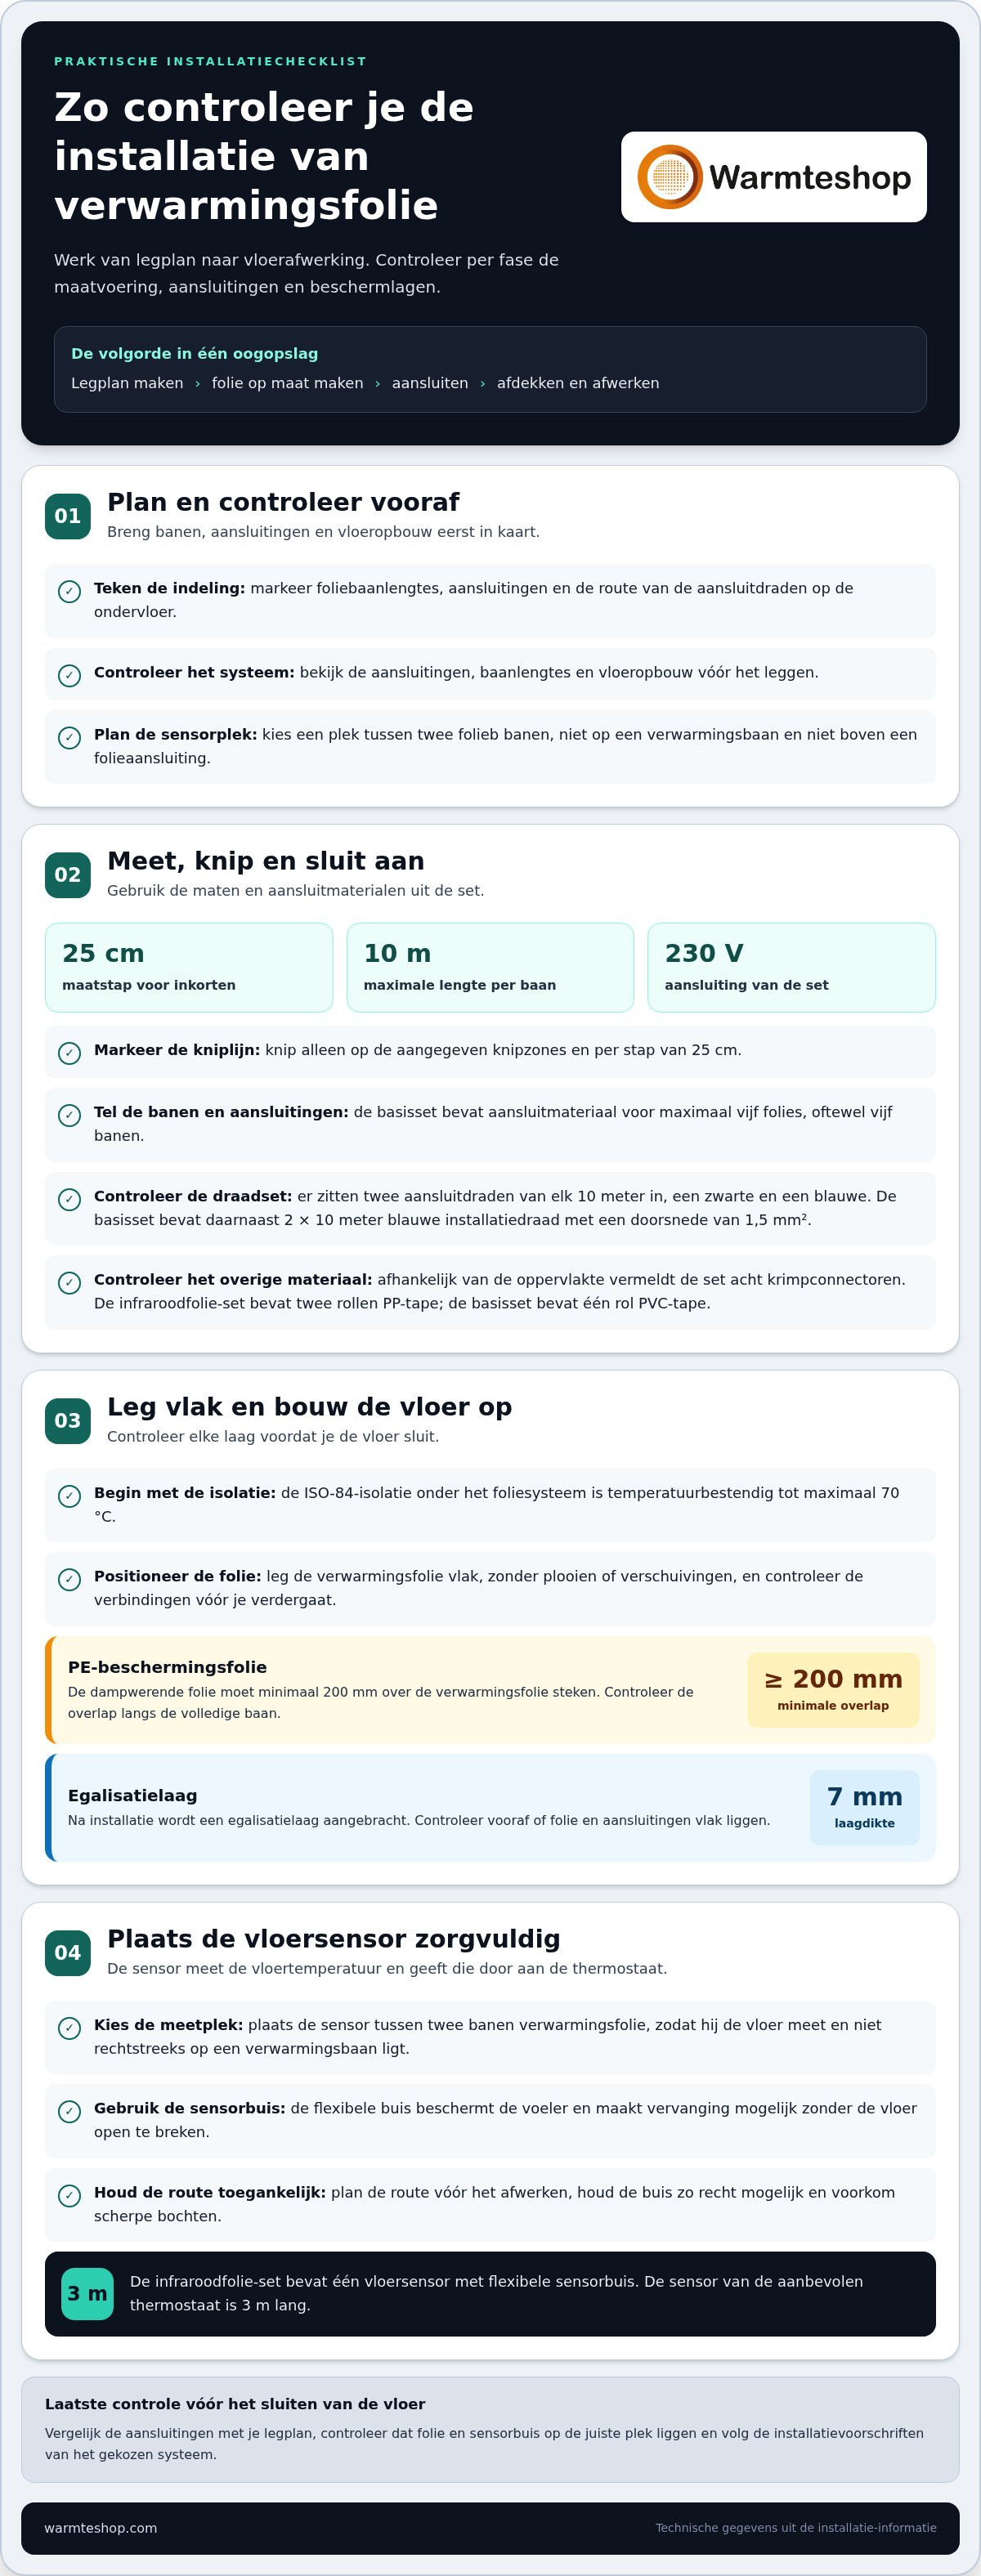
The floor sensor measures the floor temperature and transmits it to the thermostat. Place the sensor between two strips of heating foil so that it measures the floor and does not lie directly on a heating strip. The sensor belongs inside the flexible sensor tube. This protects the sensor and allows for replacement without breaking open the floor. When laying, always follow the connection and installation instructions of the chosen system.
The infrared foil set contains one floor sensor with a flexible sensor tube. The sensor of the recommended thermostat is 3 m long. Therefore, plan the route from the thermostat to the measurement location before finishing the floor. Keep the tube as straight as possible and avoid sharp bends. This allows the sensor to slide in and out when necessary. Also, ensure that the tube does not extend above a foil connection.
A thermostat controls when electric underfloor heating emits heat. The sensor helps monitor the set floor temperature. In this way, the control system supports comfort without you having to rely solely on the air temperature. The foil emits radiant heat; the thermostat determines how long the system remains active. With a suitable measuring location, the sensor measures the floor temperature representatively.
With Wi-Fi control, you can operate the thermostat via an app. The Wi-Fi V3 thermostat runs on 2 AA batteries. The receiver can control underfloor heating with a maximum of 3000 watts. Therefore, when selecting the system, check whether the total power remains within that limit. The Chronos Wi-Fi thermostat has 4 programmable switching times per day and is operated with 5 buttons. These functions vary by thermostat; choose them based on how you want to control the heating.
Warranty varies by part and type: the thermostat and floor sensor have a warranty of 2 to 3 years, depending on the type. Check the applicable warranty conditions and which parts are covered for the foil separately. Keep purchase details and installation information together. This will allow you to identify the relevant part and the original connection method later. Do not automatically confuse the warranty period for the thermostat with that for the foil.
The build-up height and floor layout also influence the sensor route. Before laying, mark the foil strips, connections, and sensor tube on the subfloor. Then choose a location between the strips, away from direct heat sources such as pipes. The Netherlands Enterprise Agency (RVO) lists infrared foils and infrared mats as separate forms of infrared heating. Therefore, when comparing complete underfloor heating sets, pay attention to the thermostat, sensor, and supplied connection materials.
An accurate installation begins with the laying plan and the technical specifications of the foil. Before laying, check the connections, roll lengths, and floor structure.
Measure each strip before cutting the heating foil. The foil can be cut to size in 25 cm increments. For a single foil strip, keep a maximum length of 10 meters. Mark the cutting line and follow the instructions for the cutting zones. This will prevent you from cutting in an unsuitable spot.
The set is connected to 230 V. The basic set contains connection material for a maximum of five foils, or five strips. It also includes two connection wires of 10 meters each, one black and one blue. Additionally, the basic set contains 2 x 10 meters of blue installation wire with a cross-section of 1.5 mm². Compare the connections with your layout plan before installing the foil.
For connecting foil strips, the set lists eight shrink connectors, depending on the surface area. The infrared foil set also includes two rolls of PP tape. The basic set contains one roll of PVC tape. Use connection material according to the included installation instructions and check each connection before closing the floor. This way, you keep track of which strip is connected to which connector.
The ISO-84 insulation under the foil system is temperature-resistant up to a maximum of 70 °C. Take this property into account when choosing materials and ensure that the substrate is ready for installation. The heating foil must lie flat, without creases or shifts. A carefully planned layout also clarifies where the connection wires run.
First lay the insulation and then position the heating foil according to the plan. The vapor barrier PE protection film must extend at least 200 mm over the heating foil. Check this overlap along the entire strip, not just at the edges. This way, you cover the system before the next floor layer is installed.
After installation, a 7 mm leveling layer is applied. This layer forms part of the floor structure and covers the electric heating. Check beforehand that connections and foil lie flat. A raised edge or shifted section can complicate the finishing process. Follow the layer structure for the chosen flooring system.
Technical support is particularly useful when the layout plan, connection materials, or floor structure raise questions. To this end, have the foil length, number of connections, and power output at hand. This data helps to discuss the situation in detail. During your preparation, also review the complete underfloor heating sets and compare the contents with your installation plan.
Calculate the total power by multiplying the heated foil surface area by watts per square meter. For 10 m² of foil at 80 W/m², this is 800 watts; the choice depends partly on insulation and heating purpose.
For primary heating, the electric floor must provide sufficient heat for the room. Therefore, take into account the insulation, the surface area to be heated, and heat loss through exterior walls or windows. For supplementary heating, the foil supports another heating system. You can then tailor the heated surface to the area where extra comfort is desired, such as a seating area.
The heating foil is available in various power variants. A higher power output provides more electrical power per square meter, but does not automatically make the choice better. First, determine whether the foil will be used for primary or supplementary heating. Then, compare the required power with the usable space and the electrical connection.
Insulation affects how much heat a room loses. For a well-insulated home, the system calculates with an installed capacity of 100 watts per m². Use this as a starting point when determining the heated surface area. If the room is less well insulated, heat loss weighs more heavily in the choice of capacity.
Distinguish between room surface area and foil surface area. According to the product information, a package containing 10 m² of 80 W/m² foil is suitable for a room of up to approximately 12 m², with about 80% coverage. That example shows why you do not automatically cover every square meter of floor. Take fixed components and the installation plan into account.
The total power is derived from the foil surface area multiplied by the power per square meter. For example, ten square meters at 80 W/m² yields a total power of 800 watts. If all the foil operates at full power simultaneously, this system consumes 0.8 kWh in one hour. The thermostat control determines the actual time the system is switched on.
Additionally, check the roll width and the number of foil sections. A described set has foil 50 cm wide with a power output of 100 W/m². A package with 10 m² of foil with 80 W/m², on the other hand, has a total power output of 800 watts. Therefore, compare both the power per m² and the total surface area if you place sets side by side.
First, note the surface area you actually want to heat. Multiply that number of square meters by the chosen power per square meter. For example: 8 m² of foil at 100 W/m² requires 800 watts. This is the installed power, not automatically the consumption per hour; the thermostat switches the system on and off.
Next, use insulation and heating purpose as selection criteria. According to the product information, a well-insulated home has a starting point of 100 watts per m². With a 10 m² package of 80 W/m², the total comes to 800 watts. Finally, check whether the receiver and electrical connection can power this system.
The floor finish determines how you limit the heat and which floor construction is suitable. Therefore, compare the temperature setting, subfloor, and product details before choosing a package.
Electric foil under a bathroom or shower floor is only suitable if the entire floor structure is intended for this purpose. This depends on the finish, the subfloor, and the installation instructions of the system.
For PVC and laminate, the product information usually recommends a thermostat limit of a maximum of 27 °C. Set this limit on the thermostat and take into account the regulations for the chosen floor. This way, you match the heat to the finish, rather than just to the capacity of the foil.
Also view the complete structure: subfloor, heating foil, protective layer, and floor finish. The installation instructions specify a 7 mm leveling layer after the electric heating has been installed. For dry construction systems or renovations, plasterboard or cover boards are also frequently used; you can find such building materials at jouwgroothandel.nl. Always check whether that layer is compatible with the floor system and the desired build-up height. A supplier can explain the product details for the relevant finish.
A bathroom or shower floor requires a suitable combination of heating, floor finish, and underlying layers. Assess the location individually: a dry bathroom floor is not the same as a shower floor. Consult the product instructions to determine if the complete system is compatible with that floor structure.
Do not simply lay foil under every tiled floor in a bathroom. First, check how heat is conducted through the chosen layers and what temperature the finish can withstand. Also, take into account the installation instructions for the room. This will prevent a combination of floor finish and heating system that is not matched.
Additionally, pay attention to the ratio between the foil surface area and the room floor. According to the product information, a package with 10 m² of 80 W/m² foil is suitable for a room with a floor area of up to approximately 12 m², at about 80% coverage. This distinction is important: the package surface area is not the same as the total room surface area. Therefore, measure the floor first and determine which parts will be heated.
For a well-insulated home, the system calculates with an installed capacity of 100 watts per m². Use this figure in conjunction with the floor finish and the available space. A package with 10 m² of foil at 80 W/m² has a total capacity of 800 watts. These figures describe the foil surface area and capacity, not automatically the temperature that each finish can withstand.
Before purchasing, briefly check the product details: note the floor finish, subfloor, desired heated area, and thermostat limit. Then compare the specifications of the delivered package with this information. For PVC and laminate, the stated limit of a maximum of 27 °C is a specific point of attention. For other finishes, follow the corresponding information from the supplier and the heating system.
For laminate, parquet, and wood, you look at foil dimensions, power output, and floor construction. Infrared heating consists of foil and mats, among other things, according to the Netherlands Enterprise Agency (RVO) in the 2024 Energy List.
The heating foil operates on 230 V and can be shortened in 25 cm increments. Before cutting, check what the foil is intended for. An example is cutting a strip to size for a straight floor area. When comparing, also consider the power output per square meter. This way, you match the foil to the heated surface and the desired temperature.
In infrared foil, carbon fiber forms the heating element. Electric current flows through the material, causing it to emit heat. When making your choice, consult the technical specifications of the foil and the installation instructions. These determine how the foil can be connected and installed under laminate, parquet, or wood.
Film dimensions vary by version. A described roll is 10 meters long and 100 cm wide; other sets use strips 50 cm wide. The thickness also varies by product: the product information lists 0.3 mm, 0.338 mm, and 0.35 mm. Therefore, compare the dimensions of the specific film you wish to order.
A limited foil thickness can be relevant when you want to limit the build-up height. Therefore, calculate the total floor build-up, including subfloor and finish. Additionally, check whether the roll width fits the available floor zones. In a room with narrow strips, a 50 cm wide strip may result in a different outcome than a 100 cm wide roll.
Carbon fiber foil provides electric resistance heating. The material heats up as soon as current flows through the heating element and subsequently transfers heat to the floor structure. Evaluate the specifications of the chosen version, such as power, dimensions, and connection. This way, you base your choice on concrete properties, not just the material name.
For laminate, parquet, and wood, the set temperature remains important. The product information usually recommends a thermostat limit of a maximum of 27 °C for PVC or laminate. For parquet and wood, follow the specifications of the floor finish. The desired temperature and the thermostat setting influence how long the heating is operated and, consequently, the energy consumption.
Foil and mats are distinct forms of infrared heating. The RVO lists both types in the 2024 Energy List. Compare the shape with the floor layout: foil can be cut in 25 cm increments, whereas mats have a different product form. Check the dimensions, power output, and installation instructions for each system.
For laminate or parquet flooring, the heating method must match the entire floor structure. Therefore, first determine which finish you are using and which surface you want to heat. Then, compare the foil or mat with the available space and the technical requirements. This will prevent you from ordering a version that does not fit your floor plan.
A 10 m² package of 80 W/m² foil has a total output of 800 watts. That concrete example helps you compare your foil surface area and energy consumption. The thermostat then determines when the system emits heat. View the complete underfloor heating sets and compare the included foil with your floor finish.
Warmteshop helps you choose a suitable infrared heating solution. Map out your requirements using the information on power output, floor construction, and thermostat control. Then, discuss which infrared underfloor heating suits your room and floor.
Are you looking for warmth for another spot in your home? An infrared mirror combines warmth with a mirror, while infrared glass heating or an infrared towel dryer caters to other living preferences. Start your choice with the room you want to make more comfortable and how you use it.
Would you like to explore the possibilities or receive personal advice? Contact Warmteshop or visit warmteshop.com.
A warm floor starts with a solution that suits your home and daily use. First, determine which rooms you want to heat and how the heating aligns with your flooring plans. This way, you make a conscious choice for technology and comfort that suits your home.
Would you like to explore the possibilities further? Warmteshop offers infrared heating, infrared panels, and infrared mirrors for a wide range of locations and living preferences. Consider where you want heat and what function that space serves in your daily life. This way, you make a targeted choice, rather than relying solely on individual technical features.
Explore the possibilities for an infrared underfloor heating set and turn your wishes into a concrete plan. Ask Warmteshop for advice on a suitable heating solution. With a well-coordinated choice, you create space for comfortable living, step by step.
The running costs of a complete **infrared underfloor heating set** depend on the chosen power output and your current electricity rate. That amount applies to the specified package and fluctuates with your electricity rate. The thermostat does not continuously switch the heating on at full power. For a personal estimate, multiply the operating consumption by your rate and the actual switch-on time.
Choose a thermostat whose receiver can switch the total power of your foil. The Wifi V3 thermostat can control a maximum of 3000 watts and runs on 2 AA batteries. If you want to program heating times, the Chronos Wi-Fi thermostat offers 4 switching times per day. Compare the features with your usage pattern and check if the chosen receiver is included in the package.
An infrared underfloor heating set consists of heating foil and components for control and connection. The foil set contains one floor sensor with a flexible sensor tube. Depending on the set and surface area, the connection material may consist of eight crimp connectors and tape. The basic set is designed for a maximum of five connections, or five foils. View the contents list and match the components to your installation plan.
The right choice depends on the floor finish, the structure, and the usage instructions for both the foil and the flooring. For PVC and laminate, the product information usually recommends a thermostat limit of a maximum of 27 °C. Tiles and parquet require checking the corresponding system and flooring information. Before purchasing, compare the permissible temperature and the complete layer structure, not just the foil capacity.
You can choose the system as primary or supplementary heating. The choice depends on the heat loss, insulation, and the planned foil surface area. As primary heating, the calculated capacity must match the room's heat demand. As supplementary heating, the heated area can be smaller, for example, around a fixed seating area. Determine the purpose before setting the capacity and the amount of foil.
Start with a flat, suitable subfloor and lay the insulation according to the system instructions. The specified ISO-84 insulation is temperature-resistant up to a maximum of 70 °C. Next, place the foil according to the installation plan and connect the components as prescribed. The floor structure also includes a 7 mm leveling layer. Match the chosen subfloor to the finish above it.
Use a thermostat that matches the capacity of the foil and a sensor that belongs to the system. The foil set contains one floor sensor with a flexible sensor tube; the sensor of the recommended thermostat is 3 m long. Place the sensor in the tube between two pieces of foil so that it measures the floor. Check in advance whether the cable length reaches the planned measurement location.
Calculate the energy consumption by multiplying the power consumption in kilowatts by the actual usage time in hours. The thermostat determines how long the foil remains switched on. Therefore, one hour at full power is not the same as one hour of heating with thermostat control. Multiply the consumption in kilowatt-hours by your electricity rate to estimate the costs. Record the values separately for clear comparison.


