
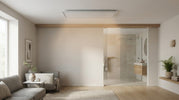
1000W infrared heating panel for ceiling mounting
, by Warmteshop Infrared heating, 9 min read
, by Warmteshop Infrared heating, 9 min read
A power output of 1000 watts doesn't tell the whole story: the room and the installation also matter. A ceiling-mounted 1000W infrared heating panel is intended for rooms of 10 to 25 m². Some versions have an alumin…
A power output of 1000 watts doesn't tell the whole story: the room and installation also matter. A ceiling-mounted 1000W infrared heating panel is intended for rooms of 10 to 25 m². Some versions feature an aluminium surface and come equipped with a remote control and a 24-hour timer.
It is only natural that you want to know in advance whether such a panel suits your room and how it looks on the ceiling. In this article, you will discover which technical properties are relevant, how material and dimensions play a role, and what to expect during installation. This way, you get a clear picture of what you are comparing without having to struggle through technical jargon.
You will also read what to look out for if you want to use the panel in the bathroom. The explanation helps you assess whether a 1000W panel is suitable for your space, your heating needs, and the location where you want to mount it.
With a ceiling panel, the dimensions help determine where the heat is directed. A standard 600 × 600 millimeter infrared panel uses approximately 350 watts. That example shows why size and power do not automatically increase proportionally. Therefore, a 1000-watt panel cannot be assigned the same dimensions without product specifications. Compare the stated length and width with the available ceiling space. Also consider the shape: a square panel requires a different placement than an elongated model. This prevents lighting, beams, or other obstacles from restricting the chosen spot.
The material also contributes to the panel's appearance. An aluminium surface has a sleek finish. Compare the visible edge, colour, and connection to your ceiling. The weight is also important, especially if you want to mount the panel above a specific spot. Include this in your installation plan and check if the supporting structure is suitable. This allows you to assess both the appearance and the practical placement.
Additionally, use the power output as a tool for estimating the room. Use the power output at most as a general indication; the required capacity also depends on the room and the desired comfort level. Mathematically, a 20-square-meter room thus comes out to 1000 watts. View this calculation as a starting point for the comparison, not as an exact measure for every ceiling. Insulation, layout, and the desired comfort level also play a role. With direct heat radiation, occupants perceive the room temperature as two to three degrees warmer than the actual temperature.
Before choosing a 1000W infrared panel, carefully measure the available ceiling space. Note the clear width and length and compare them with the product dimensions. Then check the location of cables, lighting, and mounting points. This way, you assess size, material, and mounting location together, rather than relying solely on the wattage.
For bathroom use, compare the IP rating of the panel with the location where you intend to mount it. The main safety risks are moisture near electrical components and a mounting location that does not comply with the product instructions. Therefore, assess both the marking and the prescribed application.
The IP code indicates how well a device is protected against solid particles and moisture. This code does not automatically mean that the panel is suitable for every location in the bathroom. View the full IP rating and follow the product's operating instructions. Conditions at a washbasin, for example, may differ from those next to a shower.
First, map out the bathroom: note the location of the shower, bath, and sink, and determine possible mounting locations. Compare these with the instructions for the chosen panel. Take splashing water and condensation into account, and do not choose based solely on power or design. Warmteshop Infrared Heating offers infrared bathroom heating, including mirror panels, towel dryers, and ceiling panels. Check which model suits the space and the intended location.
When inspecting an electrical panel, check the housing, connecting cable, and mounting points for damage. Also examine the markings on the device and the product documentation. This information helps you understand the intended application and mounting method. A certification mark or other product marking does not replace the user manual. Always follow the manufacturer's installation instructions and do not use a panel with visible damage to electrical components.
Create a short checklist before installation: note the model, read the environment for which it is intended, and review the prescribed connection method. Match the electrical connection to the device and the situation in your home. This way, you assess moisture load, placement, and product characteristics before using the 1000W infrared heating panel in the bathroom.
When mounting on the ceiling, you must pay attention to the load-bearing capacity, the position, and the electrical connection. Start with the installation manual for the chosen panel, as the mounting and connection differ depending on the version.
Choose a location where the panel can radiate freely. Take beams, lamps, and tall cabinets into account. Measure the available space and compare it with the dimensions of the panel. Mark the mounting points according to the instructions and check for pipes or cables before drilling. Also, check if the ceiling material is suitable for the prescribed mounting method.
Before installation, check how the power supply reaches the panel. With a fixed connection, the power cable runs directly to the device, not via a separate plug. Follow the manual for the connection method specific to the model and have electrical connections carried out by a qualified installer. They can assess the wiring and connection location to ensure the installation is suitable for the panel and your home.
Practical preparation consists of these steps:
For a 1000-watt panel, take into account the location of the heat source and the layout of the room. Above a dining table, the desired direction of radiation may differ from that in an open seating area. Also consider the controls: a switch or thermostat must remain accessible. After installation, check that the panel is securely fastened and the cable is properly connected. Before commissioning, follow the manufacturer's instructions to ensure that the controls and installation work correctly together.
For an infrared panel, 1000 watts indicates how much electrical power it consumes. Ceiling-mounted models with that power are offered for rooms of 10 to 25 m². That range provides a first point of comparison, but does not automatically guarantee the same heating experience in every room. The layout, insulation, and placement all influence how the heat is distributed. Therefore, compare the stated application range with your room and heating goal.
The operation can also vary depending on the model. A 1000W panel with a remote control and a 24-hour timer is described as suitable for temperatures up to 120 °C. A 1000-watt electric infrared heater is likewise described as suitable for temperatures up to 120 °C. Check how the manufacturer describes this temperature indication for the device. This way, you will not confuse it with a timer setting or remote control.
The panel has an aluminium surface. This material partly determines the visible finish; the wattage indicates the electric heating capacity. Evaluate these data separately. The finish in itself says nothing about the operation or the room for which the panel is suitable. Therefore, compare the material, the wattage, and the stated room suitability.
Use these points as a comparison list when comparing different models. A 1000-watt infrared panel for ceiling mounting combines power with a specific placement. Therefore, also check whether the mounting type and operation suit your space. This way, you base your choice on the features that matter for your application, and not just on the wattage.
Warmteshop offers electric underfloor heating as an alternative if you prefer to experience warmth from the floor. This can be suitable for a renovation or remodeling, or if warm feet are important to you and you prefer not to mount a panel on the ceiling.
You can also compare electric underfloor heating with infrared underfloor heating. For targeted heat in a specific spot, infrared panels are another solution. The choice depends on the room, the floor construction, and how you want to experience the heat at home. Tailor the solution to your home and daily comfort.
Contact Warmteshop Infrared Heating if you would like to discuss the possibilities for your home.
The best next step is to take your daily usage as a starting point. Where do you primarily want a pleasant sense of warmth, and at what times do you use that space? By listing these wishes in advance, you make the choice more personal than if you only look at the output. A 1000-watt infrared heating panel can be part of that consideration, alongside the layout and appearance of the room.
Warmteshop can help you choose infrared heating that suits your home and comfort preferences. Discuss your plans and compare which solution fits your interior and daily life.
Contact Warmteshop Infrared Heating if you would like to discuss your heating plans further. A well-considered choice helps you work towards a comfortable home step by step.
There are ceiling-mounted versions of 1000 watts. Some have an aluminium surface, remote control, and a 24-hour timer; the stated temperature suitability is up to 120 °C.
The panel uses 1000 watts of electrical power. The energy cost depends on the duration of use and the electricity rate.


