


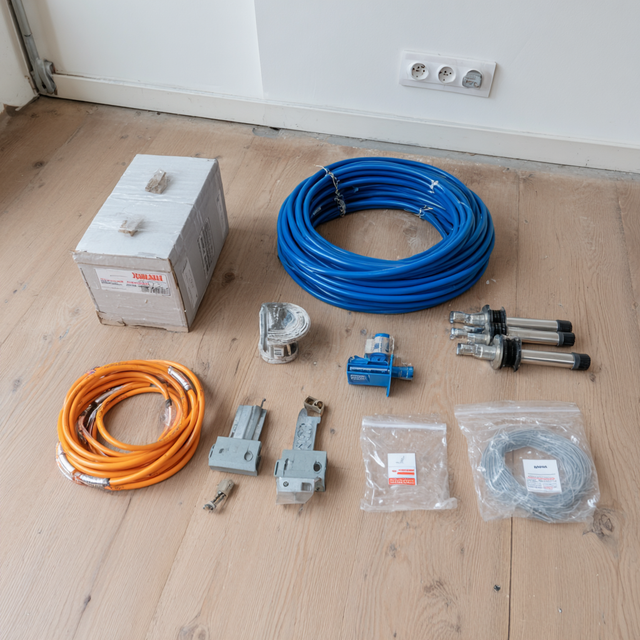
individual underfloor heating foil components for a new installation, expansion, or repair? Never choose components based solely on appearance or size. Heating foil, connectors, connecting wires, insulation, protective film, thermostat, and floor sensor must be technically compatible with the same system. In this buying guide, you will learn what each component does, which details to check before purchasing, and how to avoid costly installation errors.
What individual parts are available for underfloor heating foil?
A complete foil system consists of more than just the heating element. The exact composition varies by brand and product line. Therefore, always check the installation manual and product specifications for your system. Do not use parts from different systems together unless the manufacturer explicitly permits that combination.
- Heating foil: the electric element that distributes heat evenly under the floor.
- Connection connectors: connect the power wires to the conductive tracks of the foil.
- Connection and linking wires: carry current from the thermostat to one or more foil strips.
- Insulation and sealing tape: protects exposed copper, connectors, and finished ends according to the prescribed system.
- Subfloor or insulation boards: form a flat surface and limit heat loss downwards.
- Protective PE film: protects the heating system against moisture and mechanical influence, if prescribed.
- Thermostat: regulates the desired temperature and switches the heating on or off.
- Floor sensor and sensor tube: measure and limit the floor temperature and allow for sensor replacement.
- Crimping, pressing, or assembly accessories: are required for a connection according to the manufacturer's instructions.
When do you buy individual parts instead of a complete set?
A complete set is usually the clearest option when installing an entirely new room, as the main components are coordinated. Individual parts are particularly useful when expanding an existing system, adding a missing accessory, or replacing an identical component. Furthermore, they allow you to create a custom layout when standard packages do not match the net heatable surface area.
First, check what is already present. Note the brand, product line, article number, foil type, voltage, power per square meter, roll width, connector type, and sensor type. Also check the maximum load of the thermostat and the electrical circuit. Without this information, compatibility cannot be reliably determined.
Loose underfloor heating foil components: check compatibility
For electric underfloor heating, a “approximate fit” is insufficient. A connector must be mechanically and electrically suitable for the conductive track. Wire thickness, insulation material, and sealing method must also meet the system requirements. An unapproved combination can cause poor contact, localized heat generation, or failure.
- Locate the original manual and the rating plate or the packaging.
- Compare the product line and the exact film type.
- Check voltage, power, and maximum current per track or circuit.
- Compare connector, wire cross-section, floor sensor, and thermostat load.
- Check the prescribed subfloor, protection, and floor finish.
- Have any doubts about the electrical connection assessed by a qualified installer.
Do not automatically replace a damaged part with a universal variant. Manufacturer-specific connectors and sealing materials are often designed for a specific thickness, width, and electrical load. Therefore, preferably choose components from the same approved system series.
Choosing the right heating foil
Heating foil is offered in various roll widths, lengths, and power ratings. The stated wattage per square meter indicates the heat output under specified conditions. It does not automatically mean that the foil is suitable as primary heating. Heat loss, insulation, available floor area, and the maximum permissible floor temperature together determine the achievable result.
First calculate the net heatable surface area. Subtract built-in cabinets, kitchen units, sanitary fixtures, and other zones where the manual states that foil should not be applied. Do not overlap foil strips. Maintain the prescribed distance from walls, pipes, and obstacles. Cut only along marked cutting lines and never through an active heating element.
Which underlay and protective film do you need?
Furthermore, a flat, clean, and stable surface helps prevent damage. Small sharp parts, screw heads, or irregularities can damage the foil during or after installation. Many dry construction systems therefore require a specific insulating underlay. This supports the element, helps limit downward heat loss, and provides space for connections or sensors.
Additionally, a vapor barrier or protective film above the heating system may be mandatory. Type, thickness, overlap, and finish vary by system. Take these values directly from the manual. Do not simply use construction foil, tape, or insulation material as a substitute when the manufacturer prescribes a specific product.
Separate underfloor heating foil components: thermostat and floor sensor
A thermostat with a floor sensor is important for monitoring the floor temperature. This protects both the heating system and the floor finish. The thermostat must be suitable for electric underfloor heating, support the correct sensor type, and have sufficient switching capacity for the total connected load.
Calculate the electrical load based on the total connected power. Divide the wattage by the mains voltage for an indication of the current, but have the final circuit, protection, and connection checked according to applicable regulations. If the total power exceeds the permissible thermostat load, a suitable switching solution may be required. Have this designed and connected by a qualified professional.
Install the floor sensor according to the manual between the heating strips and not directly on a heating track. A sensor tube allows for later replacement. Seal the end of the tube so that glue, moisture, or dirt cannot enter, without interfering with the sensor's operation.
Connectors, connecting wires and insulation
In addition, the electrical connection is a critical part of the system. Use the prescribed tools and follow the assembly sequence exactly. A connector that is crooked or insufficiently crimped can develop higher contact resistance. Therefore, every connection must be both mechanically sound and fully insulated.
- Use only connectors that match the copper track and foil thickness.
- Select the prescribed wire cross-section and temperature-resistant insulation.
- Relieve the connecting wires so that there is no tensile force on the foil.
- Completely insulate unused copper ends with the appropriate material.
- Cross or bundle wires only as permitted by the installation instructions.
- Carefully work bulges into the subfloor without damaging the foil.
Measure the system before, during, and after installation as prescribed by the manufacturer. Record the measurements on a control card if one is included with the system. This way, you will detect any damage before the floor is permanently sealed.
Suitable floor finish: laminate, parquet, PVC, or carpet?
Many heating foils have been developed for dry construction under a floating floor, such as suitable laminate or multi-layer parquet. However, not every floor finish is automatically suitable. Check the maximum thermal resistance and permissible surface temperature with both the floor manufacturer and the heating supplier.
PVC, vinyl, and carpet may require additional pressure-distributing plates or another system. Tiles are usually not placed directly on standard heating foil. Thick rugs, mattresses, or highly insulating objects can also retain heat. Do not place them over active heating zones if this could lead to overheating according to regulations.
Is underfloor heating foil allowed in a bathroom?
Not every foil system is suitable for a damp or wet room. Check the protection class, permissible zone, residual current protection, and specific installation requirements. Do not assume suitability simply because a single component appears water-resistant. The complete assembled system must be approved for the application. Always have installation in a bathroom checked against applicable electrical regulations.
Step-by-step plan for individual underfloor heating foil components
- Create a layout plan: draw the net heatable zones, foil strips, thermostat, sensor, and wiring routes.
- Check the surface: make it flat, dry, clean, and free of sharp parts.
- Lay the prescribed underlay: carefully incorporate cutouts for the sensor, wires, and connectors.
- Place the foil strips: maintain distances, avoid overlap, and cut only where permitted.
- Assemble the connections: use the correct connectors, wire, and insulation according to the manual.
- Measure and document: check the electrical values before the protective layer and again before commissioning.
- Apply protection: place the prescribed film or pressure-distributing layer without damaging the system.
- Have the electrical connection made: the fixed connection, protection, and final inspection are the responsibility of a qualified installer.
Avoid common mistakes
- combining parts from different brands without written confirmation of compatibility;
- calculate with the full floor area instead of the free, heatable area;
- Place foil under fixed furniture or kitchen cabinets;
- overlap, fold, pierce or shorten foil outside the cutting line;
- place a sensor directly on a heating part;
- exceed the maximum load of thermostat, track or circuit;
- close the floor without intermediate electrical check;
- use an unsuitable floor finish or a temperature setting that is too high.
Loose underfloor heating foil components: required quantity
First, measure the free floor zones where foil may actually be laid. Then, divide these zones into straight strips that match the available foil width. Take into account permitted cutting intervals, the connection side, bends in the wire routes, and space for connectors. Do not order solely based on the gross room area.
Next, create a parts list per row: foil, two electrical connection points if the system requires it, insulation for all open ends, sufficient connecting wire, and fastening material. Add the underlay and protective layer for the prescribed total surface area. Finally, check whether the thermostat and protection can handle the combined electrical load.
Consumption and control of foil heating
Therefore, you calculate the maximum electrical power by multiplying the installed number of square meters by the power per square meter. The actual consumption then depends on the set temperature, operating time, insulation, outside temperature, and heat demand. A thermostat switches off the system as soon as the set values are reached, but poor insulation continues to cause additional heat demand.
A lower floor temperature, a suitable time program, and a well-insulated subfloor can limit unnecessary consumption. However, never choose a setting above the limit of the floor finish. Comfort, floor protection, and safety take precedence over the highest possible heat output.
Frequently asked questions about separate foil components
Can I add only extra heating foil to an existing set?
Only if the manufacturer permits expansion and the existing thermostat, wiring, connectors, and circuit have sufficient capacity. Also check the maximum track length and total current. Have the final connection assessed by a qualified installer.
Are connectors for heating foil universal?
No, you should not automatically assume that. Dimensions, contact method, electrical load, and insulation can vary. Use only demonstrably compatible parts.
Can I repair damaged heating foil?
Switch off the system and do not cover the floor any further. Whether repair is possible and permitted depends on the type of damage and the manufacturer's instructions. An improvised repair is not a safe solution.
Do I always need a floor sensor?
Follow the system requirements. With many electric foil systems, a floor sensor monitors the maximum floor temperature. This is particularly important for temperature-sensitive floor finishes.
Can heating foil serve as primary heating?
That depends on the heat loss, the available heatable surface area, the capacity, and the system approval. Have a heat loss calculation performed for primary heating. Without that calculation, you cannot reliably predict whether the system will keep the room warm on cold days.
Choosing individual underfloor heating foil components
Start with the system you already have or want to install. Gather all technical data and only then create the parts list. Compare product line, power, dimensions, connectors, sensor type, thermostat load, subfloor, and protective coating. This way, you avoid buying individual components that seem good separately but are not safe or usable together.
View the current range of underfloor heating foil spare parts. Read the compatibility information and installation instructions for each product. If you are unsure about a combination or electrical load, ask for advice before ordering or closing the floor.