
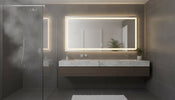
Installing infrared mirror heating: the complete guide to a steam-free bathroom
, by Warmteshop Infrared heating, 18 min read
, by Warmteshop Infrared heating, 18 min read
Imagine stepping out of the shower and not having to immediately reach for a towel to wipe the thick fog off your mirror, while the rest of the bathroom still feels chilly. A fogged-up mirror and a cold start…
Imagine stepping out of the shower and not having to immediately reach for a towel to wipe the thick fog from your mirror, while the rest of the bathroom still feels chilly. A foggy mirror and a cold start to the day are a daily source of frustration for many. Naturally, you want more comfort, but the combination of electricity and moisture understandably raises questions about safety. It is perfectly understandable that you want to know exactly how to properly install infrared mirror heating without the risk of short circuits or technical complications.
In this comprehensive guide, you will learn how to safely and efficiently apply this innovative technology for immediate comfort and a fog-free mirror. We walk you through the technical requirements, such as the important IP44 certification for damp rooms, and explain how the healthy radiant heat promotes your well-being. You will gain insight into the best installation location and how to achieve a professional finish. This way, you will soon enjoy a warm bathroom with a stylish, invisible heating source that fits perfectly into a modern and energy-efficient interior.
An infrared mirror is much more than a reflective surface for your daily grooming. It is a fully-fledged electric heating element that uses long-wave infrared radiation. When you decide to install infrared mirror heating, you are choosing a smart dual function for your bathroom. The back of the mirror contains an advanced heating element that heats the glass evenly. As a result, condensation disappears immediately. Because the surface of the mirror is warmer than the surrounding air, water vapor simply has no chance to condense on the glass. This means that after a warm shower, you can immediately do your hair or shave without first leaving streaks on the glass with a towel.
Compared to traditional radiators, a heating panel saves a significant amount of space. Large, bulky radiators that collect dust and take up valuable wall space are a thing of the past. A slim mirror on the wall not only looks more modern and sleek, but is also a sustainable choice. You heat the zone you are currently in very precisely, which helps to manage your energy consumption efficiently without compromising on luxury.
Understanding how infrared heating works is essential to appreciate its unique comfort. Unlike central heating, which heats and circulates the air, infrared heats the objects and people in the room directly. This feels like the gentle, deep warmth of the sun on your skin, even on a cold winter morning. This offers significant benefits for your health. There is hardly any air movement, which limits the circulation of dust, mites, and pollen to a minimum. Furthermore, the heat penetrates directly into the walls and tiles. This keeps your bathroom structure dry and prevents moisture from seeping into the grout, effectively combating mold formation.
A suitable solution is available for every bathroom style. You can choose a minimalist, frameless version that blends seamlessly into a modern interior, or a model with integrated LED lighting for extra atmosphere and functionality at the washbasin. It is important to match the wattage to the size of the room. A compact mirror works excellently as supplementary heating, while a larger panel is powerful enough to make the entire bathroom pleasantly warm. At Warmteshop, you will always find an infrared mirror that matches your specific needs and the technical layout of your home. By making the right choice, you combine aesthetic pleasure with a future-proof heating method.
Good preparation is half the battle when installing infrared mirror heating. Before you pick up the drill, it is essential to check the power output. In a bathroom, you often need a wattage of 60 to 100 watts per square meter for comfortable primary heating. Are you using the mirror as supplementary heating? Then a lower power output is often sufficient to keep the mirror condensation-free and make the area around the sink pleasant. Also, check whether your current circuit can handle the extra load. Although a mirror panel usually consumes no more than 300 to 500 watts, a stable electrical basis is necessary for safe operation.
Safety comes first in damp areas. That is why all Warmteshop mirrors are at least IP44 certified. This certification guarantees that the panel is splash-proof and can be safely used in the bathroom. For installation, you need a basic set of tools:
The bathroom is divided into different zones that determine where electrical appliances may be placed. Zone 0 is the interior of the bath or shower, and Zone 1 is the space directly above it. You should never place an infrared panel here. Installing infrared mirror heating usually takes place in Zone 2 or outside of it. Zone 2 is the area up to 60 centimeters around the washbasin, bath, or shower. Thanks to the IP44 standard (also known as IPX4 in Belgium), the mirror can be safely mounted here. Always ensure that the connection point is earthed to rule out any risk of a short circuit. Are you unsure about the wiring? Then you can always request a no-obligation quote for bathroom heating for a professional installation.
For the best results, hang the mirror at eye level, but also take heat radiation into account. An infrared panel emits heat at an angle of approximately 45 degrees. Therefore, do not hang the mirror too close to a corner or directly behind a door, as this blocks the distribution of heat. Also, avoid a location directly opposite a window. Glass does not reflect infrared radiation but transmits it, causing heat to be lost more quickly. A solid wall opposite the mirror is ideal, as it absorbs the heat and slowly releases it back into the room. This creates a stable and pleasant climate without unnecessary energy loss.
Are you handy and does the mirror have a simple plug connection? Then installing infrared mirror heating yourself is a great option. It gives you complete freedom to get started at your own pace and immediately saves on labor costs. For many DIY enthusiasts, mounting with the included bracket system is quite manageable. However, as soon as you opt for a seamless finish without visible cables, more technical expertise is required. A permanent connection to the mains in a damp room requires strict adherence to safety standards to eliminate any risk.
Professional installation offers not only convenience but also the absolute certainty of a watertight guarantee. When a technician handles the installation, you are fully covered against any errors during the process. Furthermore, experts have the right measuring equipment to check the load on your circuits. Curious about how other customers experienced this process? Check out our installation reviews to get an idea of the quality and meticulous workmanship our professionals provide.
Incorrect installation poses risks that can significantly shorten the lifespan of your product. In a bathroom, the sealing of electrical connections is crucial. Poorly shielded connections can eventually lead to short circuits or corrosion of the internal electronics due to constant exposure to water vapor. Using unsuitable mounting materials for your specific wall type is also a common mistake. This can cause unnecessary stress on the glass panel, which in extreme cases can even lead to glass breakage. By choosing an expert approach, you prevent these costly problems and ensure a safe living environment.
At Warmteshop, we understand that every bathroom and every personal situation is different. With our 18 years of experience, we are happy to act as your guide in the world of sustainable heating. Our advisors help you determine the most efficient position for your mirror so that radiant heat is utilized optimally. Do you have doubts about the power supply or the load-bearing capacity of your walls? Don't worry, we will visit you free of charge for personalized advice at your home. Our own technicians can then take care of the entire installation, from the wiring to the connection with your smart home system. This way, you can enjoy a comfortable and healthy bathroom without any stress.
Now that the preparations have been made and the right tools are ready, you can start the real work. The process of installing infrared mirror heating is manageable for a handy do-it-yourselfer, provided you work accurately. Safety is paramount here, so always start by switching off the relevant circuit in the fuse box. Use a voltage tester to double-check that the wires are truly de-energized before touching them.
Follow these steps for a solid result:
For the most stylish finish, it is crucial that no loose cords run across the tiles. The best method is to install a recessed box directly behind the center of the mirror. This ensures the connection is completely hidden behind the panel. During a thorough renovation, you can route the cables into the wall before tiling. Is routing not possible? Then opt for a minimalist, self-adhesive cable duct in the color of your grout or tiles to minimize the visual impact. This keeps the focus on your beautiful mirror and not on the technology behind it.
If you choose a model with integrated LED lighting, you will often have to deal with an extra set of wires or a separate transformer. It is smart to be able to switch the heating function and the lighting separately. This way, you can use the lighting in the summer without turning on the heating, which is extra energy-efficient. Many of our panels are equipped with a subtle touch switch on the glass. Always thoroughly test these functions and any dimmer before permanently locking the mirror into the brackets. Do you want to be sure that everything is technically perfectly connected? You can order an infrared mirror and leave the complete installation to our experienced technicians.
As soon as you have finished installing infrared mirror heating, the real enjoyment begins. But to maximize your comfort and keep your energy bill low, the way you use the system is at least as important as the installation itself. A thermostat is not a luxury in this regard, but an essential component. Without smart control, the panel would remain on unnecessarily long, whereas you want the heat to be there only when you need it. By setting time schedules, you ensure that the mirror starts heating up just before your alarm goes off. This way, you always step into a comfortable bathroom without energy being lost during the night.
Fortunately, maintenance is very simple, which contributes to the long lifespan of the panel. Because an infrared mirror has no moving parts and attracts hardly any dust due to the lack of air circulation, it stays much cleaner than a traditional radiator. A soft, damp microfiber cloth is usually sufficient to keep the glass surface shiny and the heat transfer optimal. Avoid aggressive abrasives that can damage the coating.
Do you want to transform your bathroom into a true wellness space? Then consider combining your mirror with an infrared towel dryer. This creates a second heating zone in the room. While the mirror provides a clear view and direct heat at the sink, the towel dryer ensures dry, warm towels and a stable base temperature in the rest of the room.
Integration with smart home systems such as Google Home or Alexa takes your bathroom comfort to a higher level. You can control the mirror heating from anywhere via an app on your smartphone. Arriving home unexpectedly early? Switch on the heating from the car. Furthermore, smart thermostats offer detailed insight into your consumption. You can monitor how much energy the mirror consumes per session. With current electricity prices of approximately €0.25 per kWh in Belgium and €0.28 per kWh in the Netherlands, you can immediately see that a one-hour session costs only a few cents. This transparency helps you to be even more mindful of your energy consumption.
Infrared heating is an indispensable link in the transition to a gas-free home. When you heat your bathroom electrically, you take the step towards a sustainable solution that is ready for the future. The efficiency of this system becomes truly impressive when combined with solar panels. By running the mirror during the day on your own generated electricity, you heat virtually for free. This is not only good for your wallet but also directly reduces your household's ecological footprint. Would you like to know more about how this fits into a larger plan for your home? Then read our comprehensive guide on electric heating and discover how to keep your entire house warm smartly and sustainably.
With the right preparation and knowledge, installing infrared mirror heating is one of the most effective ways to bring instant comfort and aesthetics to your bathroom. You are not only choosing a condensation-free mirror, but also healthy radiant heat that prevents mold growth and improves air quality. Whether you handle the installation yourself or opt for the complete peace of mind of a professional, energy-efficient and stylish heating is within reach.
Warmteshop has over 18 years of experience in infrared technology and is ready to guide you every step of the way. You can visit our showrooms for a live demonstration of the various models or make use of our professional installation service throughout Belgium. This ensures that your system functions safely and with maximum efficiency. Are you ready to say goodbye to those chilly mornings and foggy windows? Request a no-obligation quote for your bathroom and discover how we can help you create the ideal sustainable solution for your home.
Yes, you may hang an infrared mirror directly above the washbasin, provided it is at least IP44 certified. This area falls under Zone 2 in the bathroom, which means the panel must be splash-proof. It is one of the most popular places to install infrared mirror heating because the direct radiant heat is most effective here for your upper body while you get ready for the day.
For a 6-square-meter bathroom, you typically need between 360 and 600 watts if you use the panel as the primary heating source. However, this depends heavily on the insulation level of your home and whether other heat sources are present. If the mirror serves only as supplementary heating to prevent condensation and warm the washbasin area, a lower wattage of around 300 watts is often sufficient.
It is technically possible to connect the mirror to an existing light fixture, but be careful with this. You must check beforehand whether the circuit can safely handle the extra load of the heating panel without overheating. It is often wiser to create a separate connection point or connect the mirror directly to a thermostat. This gives you more control over your energy consumption and the safety of your electrical installation.
No, the back of our mirrors is specially designed to hang safely against the wall without causing damage. Although the front can reach a temperature of approximately 85 to 95 degrees, the thermal insulation on the back ensures that the wall does not overheat. The heat is radiated forward into the room, exactly where you need it for a comfortable and healthy living environment.
The difference lies in the level of protection against moisture and water jets. IP44 means the panel is splash-proof, which is ideal for Zone 2 around the washbasin or bath. IP65 offers higher protection and is resistant to direct water jets, which is necessary if the heater is placed closer to the shower head. For most washbasin situations, the IP44 certification of the Warmteshop mirrors is more than sufficient for safe operation.
On average, it takes between 5 and 10 minutes for the panel to reach full operating temperature. However, condensation on the glass surface begins to disappear almost immediately as soon as the heating element is switched on. For best results, we recommend switching on the mirror via a timer or thermostat a few minutes before entering the shower, so that you always have a clear view immediately after washing.
It is absolutely not necessary to leave the heating on all day, which you will immediately notice in the system's energy efficiency. Infrared works with direct radiation, meaning you only need to heat when you are actually using the room. By using smart control, you save significantly on your costs. You can set the mirror to be active only during your morning routine for a sustainable solution.
Yes, this is an excellent combination for the ultimate wellness experience in your own bathroom. While the Sunshower provides you with infrared heat or UV light during showering, the mirror heating ensures that the rest of the room feels pleasant and your mirror remains steam-free. Together, they create an optimal climate and significantly increase comfort without unsightly radiators being visible in your stylish interior.


