Installing infrared heating yourself: The complete guide for 2026
, by Warmteshop Infrared heating, 18 min read
, by Warmteshop Infrared heating, 18 min read
What if you could transform your home into an oasis of healthy warmth without using a sledgehammer? Many people dream of a more sustainable home, but dread the mess and high costs of an in…
What if you could transform your home into an oasis of healthy warmth without using a sledgehammer? Many people dream of a more sustainable home but dread the mess and high costs of a major renovation. Fortunately, installing infrared heating yourself a surprisingly accessible project that immediately provides you with more comfort and a lower energy bill. In this guide from Warmteshop Infrared Heating, you will discover how to easily calculate the correct capacity, professionally mount panels, and seamlessly integrate your new heating system into your interior. This way, you can create a stylish and energy-efficient home where you feel truly at ease in no time.
Installing a heating system often conjures images of exposed walls, dust, and weeks of disruption. However, with modern infrared technology, this is a thing of the past. Installing infrared heating yourself is a feasible and rewarding project because the system is fundamentally modular and 'plug-and-play'. Instead of struggling with complex hydraulic balances or running water pipes throughout your home, this project focuses on the physical assembly and a safe electrical connection. This gives you the unique opportunity to save significantly on installation costs, while maintaining full control over your own renovation schedule and pace.
By self-installation, we mean the process of securely mounting the panels to the wall or ceiling and then connecting them to the electricity grid. Because no moving parts or fuels are involved, installation is many times simpler than that of traditional radiators or heat pumps. Warmteshop Infrared Heating observes that more and more consumers are choosing this route, not only to reduce costs but also to have the flexibility to tackle the heating room by room whenever it suits them.
The technology behind these panels is based on a principle we know from the sun. But what exactly is an infrared panel? It is a source that emits direct radiant heat to the objects and people in a room, without using the air as a means of transport. This greatly simplifies installation. Because you do not need to lay a piping system, a stable power outlet in the immediate vicinity of where you want to hang the panel is sufficient. This simplicity ensures that you can place the panels almost anywhere, as long as there is a clear angle of radiation to heat the room optimally.
Self-installation is a smart financial strategy that goes beyond simply saving on a professional's daily rate. The budget you would normally spend on an installer's labor can now be redirected toward the purchase of higher-quality design panels or advanced thermostats. Moreover, correct self-installation has a direct impact on your monthly energy bill; by hanging the panels exactly where the heat demand is greatest, you prevent unnecessary waste. Additionally, these systems are completely maintenance-free. You will not be burdened by annual inspection costs or mechanical wear, resulting in enormous savings for your household in the long run.
A professional result does not start with the drill, but with accurate calculation. Before you start installing infrared heating yourself, it is essential to map out the heat requirements of the specific room. Many DIYers make the mistake of selecting a panel based solely on dimensions or design, whereas the actual wattage is the deciding factor for your ultimate comfort. An under-optimized system must constantly operate at full power to keep the room at temperature, which comes at the expense of the energy efficiency for which you chose this technology in the first place.
To determine the required power output, first calculate the volume of the room in cubic meters. You do this by multiplying the length, width, and height (L x W x H). For a modern, well-insulated house, we use a rule of thumb of 25 to 35 Watts per m³. In rooms where you desire a higher temperature more quickly, such as the bathroom, a power output of at least 60 Watts per m³ is recommended. A wattage calculated too low leads to an uncomfortable indoor climate and unnecessarily high consumption costs. For an independent substantiation of the efficiency of this technology, it is useful to study how infrared heating works and how it compares to traditional systems.
Don't forget the technical side of your electrical installation either. A standard 16-amp fuse can handle a total load of up to 3680 watts. Inventory which devices are already connected to the circuit in question to prevent the fuse from blowing during simultaneous use. Warmteshop Infrared Heating advises reserving a separate circuit for heating for larger projects, especially when combining multiple panels in one zone.
The position of your panel determines the ultimate heating experience in your home. Because infrared radiation heats objects and people directly, the path between the panel and the user must be free of obstacles. Therefore, never place a panel behind a sofa or behind thick curtains; this completely blocks the radiation and wastes precious energy. Also, consider the beam angle carefully: a ceiling panel often has a wider range and prevents cold spots on the floor, which is ideal for the living room.
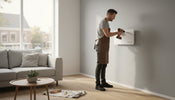
Wall mounting, on the other hand, is very effective for targeted heat at a desk or in a seating area. Make sure you have a hammer drill, a spirit level, and a voltage tester on hand before installation. With these tools, you can securely and perfectly attach the included mounting brackets, which is essential for both safety and the aesthetic finish of your new heating system.
Now that you have determined the ideal location and made the preparations, it is time for execution. Installing infrared heating yourself is a rewarding job where you see and feel the results immediately. Thanks to Warmteshop's well-thought-out mounting systems, your panel is often hanging on the wall or ceiling within just thirty minutes. Follow this step-by-step plan for a professional result:
An infrared panel is only truly efficient if the control is right. For a seamless finish, you can opt for a built-in receiver behind the panel, ensuring no cables are visible. If you prefer not to cut into the wall, slim cable ducts offer a neat solution. The heart of your new system is the smart thermostat. With this, you regulate the temperature per zone, which is essential for keeping a grip on your consumption in 2026. You can easily set schedules so that the home office is only warm during office hours, preventing unnecessary energy consumption.
Safety is not a minor issue when working with electricity. Always switch off the correct circuit breaker in the fuse box before starting the wiring and use a voltage tester to verify that the power is actually off. When installing in damp areas, pay strict attention to the IP zones; a panel in the bathroom must be at least IP44 certified to be splash-proof. It is advisable to review the general safety guidelines for space heaters to ensure that your installation meets all standards. Although installing infrared heating yourself is perfectly feasible, we recommend hiring an electrician if your mains connection needs to be upgraded or if you have any doubts about the load on your existing circuits.
Installing infrared heating yourself offers you the unique opportunity to fully integrate your heating system into your interior. While traditional radiators are often unsightly elements you would rather hide behind a surround, IR panels are actually meant to be seen. By choosing glass or mirror panels, you transform a functional device into a stylish addition to your home. One of the most popular choices in 2026 is infrared mirror heating in the bathroom. This not only looks sleek but also solves an everyday problem: your mirror will never fog up again, even after a long, hot shower.
For the kitchen or hallway, you can get even more creative. An infrared chalkboard serves as a functional heat source and handy memo board all in one. Do you prefer the heating to be as inconspicuous as possible? Then ceiling panels are the best choice for a minimalist design. These provide an almost invisible heat source, while the radiation heats the floor and furniture evenly without taking up valuable wall space.
When installing glass panels or mirrors yourself, you must pay extra attention to the weight. These panels are generally heavier than metal variants, which places higher demands on the plugs and the strength of the wall. If you are installing a towel dryer , the mounting height is crucial for optimal comfort. Hang the panel so that the towels are within reach, usually between 100 and 120 centimeters from the floor. This way, in small spaces, you combine a healthy heat source with the convenience of wonderfully warm towels, without the panel getting in the way.
The finish of the panel determines the final atmosphere in your room. Frameless panels offer an ultra-modern look that almost seems to float on the wall, while an aluminium frame can create a beautiful contrast with a dark-coloured wall. The surface texture also plays a role; glass has a reflective appearance that makes the room seem larger, while metal has a matte finish that exudes tranquility. When placing the panel, also consider the lighting in the room. A glass panel directly under a bright spotlight can cause annoying glare, so always test the position before drilling permanently. Discover all the possibilities and choose the stylish heating that perfectly matches your living preferences.
Although installing IR panels is achievable for most DIYers, we understand that you want the reassurance of a specialist. At Warmteshop, you are never alone when you decide to install infrared heating yourself. With over 18 years of experience as a market leader in the Benelux, we offer not only the products but also the expert backbone to make your project a success. We work exclusively with renowned brands such as Ecaros and Alkari, known for their high efficiency and durability. Curious how others have tackled their projects? Be sure to take a look at our installation reviews for inspiration and confirmation of the quality you are bringing into your home.
Our role as advisor does not stop at the sale. We see ourselves as your partner in the energy transition. Whether you want to tackle a single room or make your entire home gas-free, we offer the technical knowledge needed for an energy-efficient result. After all, it is not just about hanging a panel, but about creating a healthy and comfortable indoor climate that you will enjoy for years to come.
Sometimes it is difficult to determine from a screen which panel best suits your living room or bathroom. That is why you are more than welcome to visit one of our 30 stores spread across Belgium and the Netherlands. In these showrooms, you can admire the various finishes in person, from matte metal to high-gloss glass. More importantly, you can physically feel the heat and experience exactly what radiant heat does to your comfort level. Our experts are ready to review your specific DIY plan. They will advise you on the best positioning of the panels and help you choose the right thermostat system, ensuring your installation performs optimally.
Good preparation prevents unforeseen costs later on. You can easily request a no-obligation quote to accurately map out your material costs. Are you still unsure about your home's insulation value or the required capacity after reading this guide? Don't worry, we are happy to visit you free of charge for tailored advice. Should you have installed the panels yourself but prefer to leave the final electrical inspection to a professional, our technicians can provide that backup. Moreover, our extensive warranty conditions remain valid even with correct self-installation, giving you the necessary peace of mind for a sustainable future.
You now have all the tools at your disposal to transform your home with the healthy warmth of infrared. By performing the correct wattage calculation and strategically choosing wall or ceiling mounting, you lay the foundation for an energy-efficient home. Installing infrared heating yourself is not only a smart financial move to avoid direct installation costs, but also a project that ensures greater living comfort and a lower ecological footprint. Whether you choose a functional chalkboard panel in the kitchen or an elegant mirror in the bathroom, the result is always stylish heating that blends seamlessly into your interior.
With over 18 years of experience in infrared technology and certified European quality products, Warmteshop offers you the certainty you are looking for. Do you still have questions after reading this guide, or would you prefer to experience the panels in person first? Then visit one of our 30 showrooms in the Benelux for personal advice from our experts. We are happy to help you make the right choices for your specific situation, ensuring your installation perfectly matches your living preferences.
Discover our range and start your own installation at Warmteshop today! This way, you will be enjoying a wonderfully warm home in no time, without worrying about rising gas prices.
Yes, you can easily hang most panels yourself if you choose a model with a plug and have a socket nearby. Installing infrared heating yourself is a simple job for the average do-it-yourselfer thanks to the plug-and-play system. However, if you opt for a fixed connection where the cables are concealed in the wall or ceiling, we recommend hiring a professional for the final electrical connections.
You only need basic tools such as an impact drill, a spirit level, a screwdriver, and a tape measure. Most Warmteshop panels come with a handy drilling template so you know exactly where the holes need to be drilled. Use high-quality plugs suitable for your type of wall or ceiling to ensure a safe and secure installation.
Yes, that is safe as long as you use the included mounting brackets, which ensure a small gap between the panel and the wood. The back of a high-quality panel typically does not get hotter than 45 degrees Celsius, which is well below the ignition temperature of wood. This makes it a safe and sustainable solution for homes with many wooden accents or timber frame construction.
You can easily camouflage cables with slim surface-mounted cable ducts in the color of your wall or ceiling for a neat result. For a completely invisible finish, drill a hole directly behind the panel and route the wiring through the wall or false ceiling to a junction box. This contributes to a sleek and modern interior without unsightly cords obstructing the view.
You usually need a specific receiver or a smart controller because infrared panels react faster than traditional radiators. A standard thermostat for a central heating boiler often operates on a different frequency or switching method. By using a modern thermostat specifically designed for electric heating, you get the highest efficiency from your system and save more energy.
If the power output is too low, the room will never reach the desired comfort temperature, causing the panel to run constantly at 100%. This is not only uncomfortable but also results in an unnecessarily high electricity bill because the system never switches off. Therefore, ensure that you always correctly calculate the volume of the room (L x W x H) and apply the correct margins for your insulation value.
Yes, that is safe provided the panel has an IP44 rating for splash-water resistance. When installing, ensure that you place the panel in the correct safety zone, at least 60 centimeters away from the shower or bath. A mirror panel is a smart choice for the bathroom; it comfortably heats the room and simultaneously prevents your mirror from fogging up after showering.
Technically, you can connect a maximum of 3680 Watts to a standard 16-amp circuit. However, it is advisable not to place more than 3000 Watts of heating on a single circuit, so that there is still room for other devices such as lighting or a laptop. If you want to heat an entire home, it is often necessary to distribute the panels across multiple circuits to prevent overloading.


