
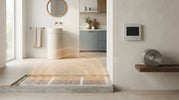
Electric underfloor heating: everything about operation, consumption, and installation in 2026
, by Warmteshop Infrared heating, 15 min read
, by Warmteshop Infrared heating, 15 min read
What if you could effortlessly transform that chilly tiled floor in the bathroom or kitchen into an oasis of comfort, without major demolition work? Many homeowners are considering electric underfloor heating for targeted co…
What if you could effortlessly transform that chilly tiled floor in the bathroom or kitchen into an oasis of coziness, without extensive demolition work? Many homeowners consider electric underfloor heating for targeted comfort, but immediately wonder whether this fits within their renovation and what it means for monthly energy costs.
That hesitation is perfectly logical. After all, no one wants cold feet in the early morning, but the fear of sky-high electricity costs or doors needing to be shortened due to excessive build-up height often acts as a deterrent. Fortunately, the latest technological developments show that there is another way: electric underfloor heating offers targeted comfort without demolition work or energy waste.
In this comprehensive guide, you will discover exactly how modern electric underfloor heating works, what the actual power consumption is, and how to easily transform your floor into pure comfort. We provide clear insight into smart thermostats, thin installation systems, and practical tips for an energy-efficient and healthy indoor climate in 2026.
Electric underfloor heating converts mains power directly into comfortable radiant heat via built-in resistance cables or wafer-thin foils. As soon as you flip the switch, electricity flows through the conductors. These generate heat evenly and release it directly to the floor finish above. In the basics of how an underfloor heating system works , you will see that radiant heat does not primarily heat the air, but rather radiates directly onto objects, walls, and people in the room. This prevents bothersome air circulation and ensures a healthy, dust-free indoor climate.
Unlike traditional central heating systems, this system operates completely dry, silently, and maintenance-free. You have no mechanical pumps that can seize up, no expansion vessel, and no risk of leaks under your floor finish. Thanks to the extremely low installation height of just a few millimeters, the system is perfectly suited for renovation projects. The existing screed usually does not need to be broken open. Furthermore, because the heat source is located directly beneath the floor surface, you benefit from a remarkably fast response time compared to bulky, water-based piping systems.
A complete installation is structured in a surprisingly clear manner and consists of three well-thought-out core components:
The main distinction between the two techniques lies in the installation and the thermal mass. Water-based underfloor heating requires thick pipes connected to a central heating boiler or heat pump, embedded in a sand-cement screed often 5 to as much as 8 centimeters thick. Such a thick layer takes hours to heat up and remains warm for a long time even after you have left the room.
Electric underfloor heating, on the other hand, requires no hydraulic couplings or breaking into load-bearing structures. Because the heating layer is wafer-thin and lies directly beneath the tiles, the floor warms up noticeably within a short time. This makes the system the most logical and energy-efficient choice for rooms you want to heat specifically and periodically, such as a bathroom during your morning routine or a kitchen while cooking.
Not every room requires the same setup. The right match between the heating element and your floor covering determines both comfort and the ultimate energy efficiency. While a tiled bathroom floor requires quick installation using tile adhesive, a living room floor made of wood or synthetic material requires dry installation. For rooms with irregular angles, such as around a freestanding bathtub or kitchen island, individual heating cables offer maximum flexibility because you can cut the loops to size yourself.
The type of floor finish determines which heating system performs best:
Ceramic tiles and cast floors conduct heat exceptionally well. They absorb the temperature quickly and radiate it evenly into the room. In the professional literature on the technical benefits of electric underfloor heating on stone floors, this direct heat transfer is specifically praised as one of the most efficient ways to quickly create comfort.
Are you choosing laminate, parquet, or PVC? These combine well with electric underfloor heating, provided you take a number of preconditions into account. Wood and synthetic materials cannot withstand extreme heat; therefore, set the floor sensor so that the surface temperature does not exceed the critical limit of 27 degrees Celsius. Additionally, pay attention to the total thermal resistance (Rc value) of the complete flooring package. The lower this resistance remains, the faster the heat reaches your living space.
Do you want to know for sure which configuration delivers the best return for your specific renovation plans? The advisors at Warmteshop are happy to help you select the right components for a worry-free installation.
The fear of a high electricity bill prevents some from choosing floor comfort. This concern arises primarily when people think that electric underfloor heating must blast at full power all day long. In reality, the power output of modern heating mats is usually between 100 and 160 watts per square meter. This power serves solely to quickly bring the floor surface to the desired temperature, after which the thermostat immediately switches back.
Because radiant heat warms your body directly from the ground, you experience the same comfortable feeling at just 19 degrees as at 21 degrees with traditional air convection. Every degree less on the room thermostat makes a noticeable difference in power consumption. Anyone seeking independent insight into consumption and energy costs will therefore see that targeted use is the secret to a low energy bill.
The final wattage you actually draw depends on three structural and practical variables:
Electric underfloor heating performs best as pure zone heating. Why keep a bathroom at 22 degrees continuously if you are only there in the morning and evening? Program the digital clock thermostat so that the floor switches on fifteen minutes before the alarm goes off and switches off again immediately after you leave.
With modern Wi-Fi control, you manage each individual living zone via your smartphone. If you are home late in the evening, you can adjust the schedule with a simple click. Furthermore, do you generate your own electricity with solar panels? Then you heat the floor virtually for free during sunny hours, making this form of heating future-proof and environmentally responsible.
Thanks to modern mat systems, installing underfloor heating is no longer a complex task requiring you to break up the entire screed. With careful preparation and precise tools, you can easily install the system yourself. Careful execution following the correct step-by-step plan guarantees a long lifespan and maximum safety
For larger areas, electric underfloor heating often requires a dedicated circuit in the fuse box to avoid overloading. Create a clear installation plan and keep built-in cabinets or sanitary fixtures free of heating wires. The sensor tube must be routed flush into the subfloor, without sharp bends, so that you can always replace the sensor effortlessly later. Ensure that the tube does not cross any heating cables to prevent inaccuracies in the thermostat readings. Finally, take clear photos with dimensions before the finishing floor is laid over it.
Measurements form the backbone of a successful installation. Use a reliable multimeter to test both the heating wire resistance and the insulation resistance. Do this at three fixed times: immediately after unpacking, after final rolling, and again after the tile adhesive has been applied. The measured values must correspond to the manufacturer's specifications on the label.
Be patient after grouting or leveling. Do not switch on the system immediately; allow the mortar to cure slowly for at least a few weeks in accordance with the adhesive manufacturer's instructions. Then, gradually increase the temperature by one degree per 24 hours using a controlled heating protocol. Preferably, have the final connection to the meter cupboard carried out by a certified installer.
Do you want absolute certainty about the right installation plan and suitable materials for your floor? Discover our complete heating solutions and request expert advice for a flawless start to your project.
The combination of two targeted heat sources creates an unparalleled indoor climate. While electric underfloor heating ensures a pleasantly warm surface without cold drafts across the floor, infrared panels on the wall or ceiling deliver direct radiant heat to the upper body. This dual action envelops you completely in comforting warmth, precisely at the moments you are present in the room.
Because both techniques operate on the basis of pure radiation rather than circulating air currents, humidity remains balanced and no dust swirls around. This is a great relief for the respiratory system. Moreover, bulky radiators and visible pipes disappear from view permanently. You reclaim valuable wall space and create a sleek, timeless interior in which heating technology seamlessly blends into the architecture of the home.
Nowhere is the interplay between these systems as palpable as in the bathroom. Electric floor mats prevent that familiar shock of ice-cold tiles as soon as you step out of the shower. At the same time, a functional infrared mirror not only offers instant comfort during your morning care but also prevents annoying condensation on the glass. Because radiant heat dries the walls and grout instantly, damp spots and mold stand no chance. This creates a hygienic wellness space in your own home.
Every home and renovation requires a well-thought-out layout plan and correctly sized capacity. With over 18 years of experience in energy-efficient heating solutions, Warmteshop guides you from initial analysis to final design:
Curious about the best heating configuration for your project? Simply request a no-obligation quote for bathroom heating and discover how comfort and energy efficiency come together perfectly.
With the right choices, you can quickly transform a chilly floor into a cozy foundation for your daily routine. Modern electric underfloor heating proves that luxurious comfort goes perfectly hand in hand with tightly controlled power consumption. Thanks to the ultra-thin systems, you enjoy quick installation without any demolition work, while smart thermostats ensure you only heat when it really counts.
As a leading specialist with over 18 years of experience in electric and infrared heating, Warmteshop is ready to assist you with sustainable solutions that prioritize aesthetics, health, and energy conservation. Whether you are renovating a bathroom or want to enhance your kitchen with targeted zone heating, our experts provide personalized and expert advice at your home nationwide. Take the step towards an energy-efficient and comfortable home today: request your no-obligation quote from Warmteshop and experience the pure pleasure of warm feet.
Yes, but that depends heavily on the level of insulation in your home. In excellently insulated new-build houses or compact spaces, electric underfloor heating functions perfectly well as the primary heating system. In existing homes, however, the system is much more frequently used as targeted comfort heating in rooms such as the bathroom or kitchen. This way, you can immediately enjoy warm feet during peak times without having to turn up the central heating for the entire house.
Certainly, that is one of the biggest advantages during renovations. Thanks to the minimal build-up height of thin heating mats, you do not need to break up the old floor. You thoroughly degrease the existing tiles and apply a suitable bonding primer. Next, you glue the mats directly with flexible tile adhesive or conceal them under a thin leveling layer, after which you immediately install your new floor finish.
The installed power is standard between 100 and 160 watts per square meter. However, this power is only utilized during the heating phase. As soon as the desired floor temperature is reached, the thermostat switches the system off at short intervals. Therefore, with targeted use—for example, two hours a day in the bathroom—the actual energy consumption remains surprisingly low and manageable.
When a cable is damaged, the circuit immediately stops heating and the thermostat displays an error message. You do not need to worry about the entire floor. Using an infrared camera and specialized measuring equipment, a technician can pinpoint the exact break location to within a centimeter. This means you only need to lift a single tile to expertly repair the conductor.
A tiled floor typically feels pleasantly warm underfoot within just 20 to 30 minutes. Because the heating cables are embedded directly in the tile adhesive just below the surface, the warm-up time is many times shorter than with traditional water pipes in thick sand-cement floors. The pleasant radiant climate then spreads gradually and evenly throughout the rest of the living space.
Yes, provided you use special heating foil and a thermostat with a floor sensor. Wood, laminate, and PVC are sensitive to temperature fluctuations and must not get warmer than 27 degrees Celsius. The floor sensor intervenes in time as soon as this threshold is reached. This keeps your floor covering in top condition while still allowing you to enjoy wonderfully comfortable feet in the living room or bedroom.
For small, low-wattage installations, an existing circuit is often sufficient, provided that not too many heavy appliances are running on it. As soon as the total power exceeds 1,000 to 1,500 watts, a separate circuit in the fuse box is strongly recommended. Especially in wet areas such as the bathroom, a dedicated fused circuit behind a residual current device (RCD) ensures maximum safety and peace of mind.


